Installing Arduino IDE
- Download and install the Arduino IDE from the https://www.arduino.cc/en/software

Adding ESP32 Support
Step 1: Configure Board Manager URL
- Open Arduino IDE
- Go to
Arduino IDE > Settings - In “Additional Board Manager URLs” field, add:

The link https://dl.espressif.com/dl/package_esp32_index.json is the Board Manager URL for adding ESP32 support to the Arduino IDE. It points to a JSON file hosted by Espressif that contains metadata and package information required by the Arduino IDE to download and configure the ESP32 board definitions, libraries, and tools. You can access the source files at https://github.com/espressif/arduino-esp32
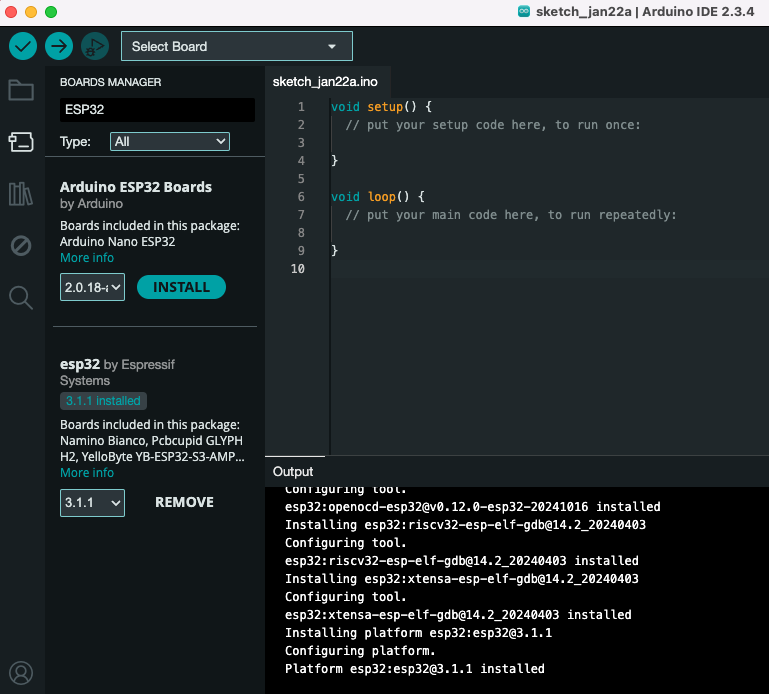
Step 2: Install ESP32 Package
- Go to
Tools > Board > Boards Manager - Search for “ESP32”
- DO NOT CHOOSE Arduino ESP32 Boards by Arduino
- Install the board package esp32 by Espressif Systems.
- Wait for installation to complete
Setting Up Your ESP32
- Connect your ESP32 to your computer via USB
- Select your board: `Tools > Board > ESP32
- For ESP32, Select
ESP32 Dev Module - For ESP32-S3, Select
ESP32S3 Dev Module
- For ESP32, Select
- Choose the correct port:
Tools > Port > [Your ESP32 Port]- on Mac, the port name is /dev/cu.usbserial-xxxxx
- on Windows, the port name is COMx
Testing Your Setup
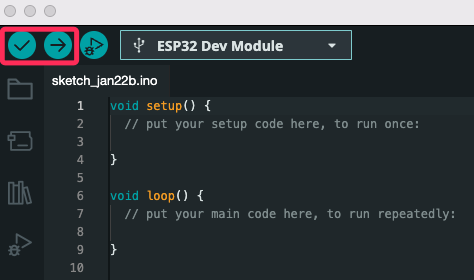
- The Arduino IDE provides a default blank sketch containing only the setup and loop functions. Let’s try compiling and uploading it to the ESP32.
- Click the verify button at top left corner to compile the code
- Click the upload button (→) to program your ESP32